Category search : undefined...

(3 results found)

Convert Font Suitcase to TTF in 3 Easy Steps

Fri Mar 10 11:47:00 2017

I came across the problem of converting an old Mac font format recently. The solution was not immediately apparent, so I will share it here.

1. Open terminal using Spotlight or whatever. It's in /Applications/Utilities.

2. Type the following and make sure you have the names of the font right or it will not work.

cat "<fontname>/..namedfork/rsrc" > ~/"Desktop/<fontname>.dfont"

Hit enter and you should see <fontname>.dfont created on your desktop. You can probably tell it worked if you see a preview of the font as the file icon.

3. Download DfontSplitter. It's free and I found it useful.

https://peter.upfold.org.uk/projects/dfontsplitter

Follow the instructions in app, selecting your destination folder, and hit 'Convert'. It's pretty self explanatory.

You should find a .ttf file present wherever you chose to save.

Problem solved. Time for tea and biscuits!

Rain or Shine - Weather Forecast Available Now!

Sat Feb 25 14:15:00 2017

Ubacoda.com is proud to announce the release of Rain or Shine - Weather Forecast.


Rain or Shine - Weather Forecast is an app you can depend upon every day for reliable reports.

Don't let rain catch you without your umbrella. Make sure you wear the right clothes on a warm day. Rain or Shine - Weather Forecast has your back.


Rain or Shine - Weather Forecast has a simplistic design that displays the data you need in a very easy to read way. Easy to understand weather icons will let you see the current weather condition at a glance. Get daily 7-day and hourly reports on the very same screen - responsive data at your fingertips. Hourly reports update on the hour every hour.

FEATURES:

- Hourly Daily updated on the hour.

- Choose from a selection of stylish themes to make Rain or Shine suit your tastes. There's something for everyone.

- Search any location and get accurate data for that location

- Save a list of locations that you wish to check often

- Easy swipe to delete list location items 

- C and F units supported

- Easy to read and view at a glance

- and much more


Get Rain or Shine - Weather Forecast and place the weather in the palm of your hand!

Download is now on iOS & Android

Download Rain or Shine - Weather Forecast on iOS

Download Rain or Shine - Weather Forecast on Android


Localising App Names for iOS and Android

Mon Aug 1 14:42:00 2016

How to localise your app name on iOS

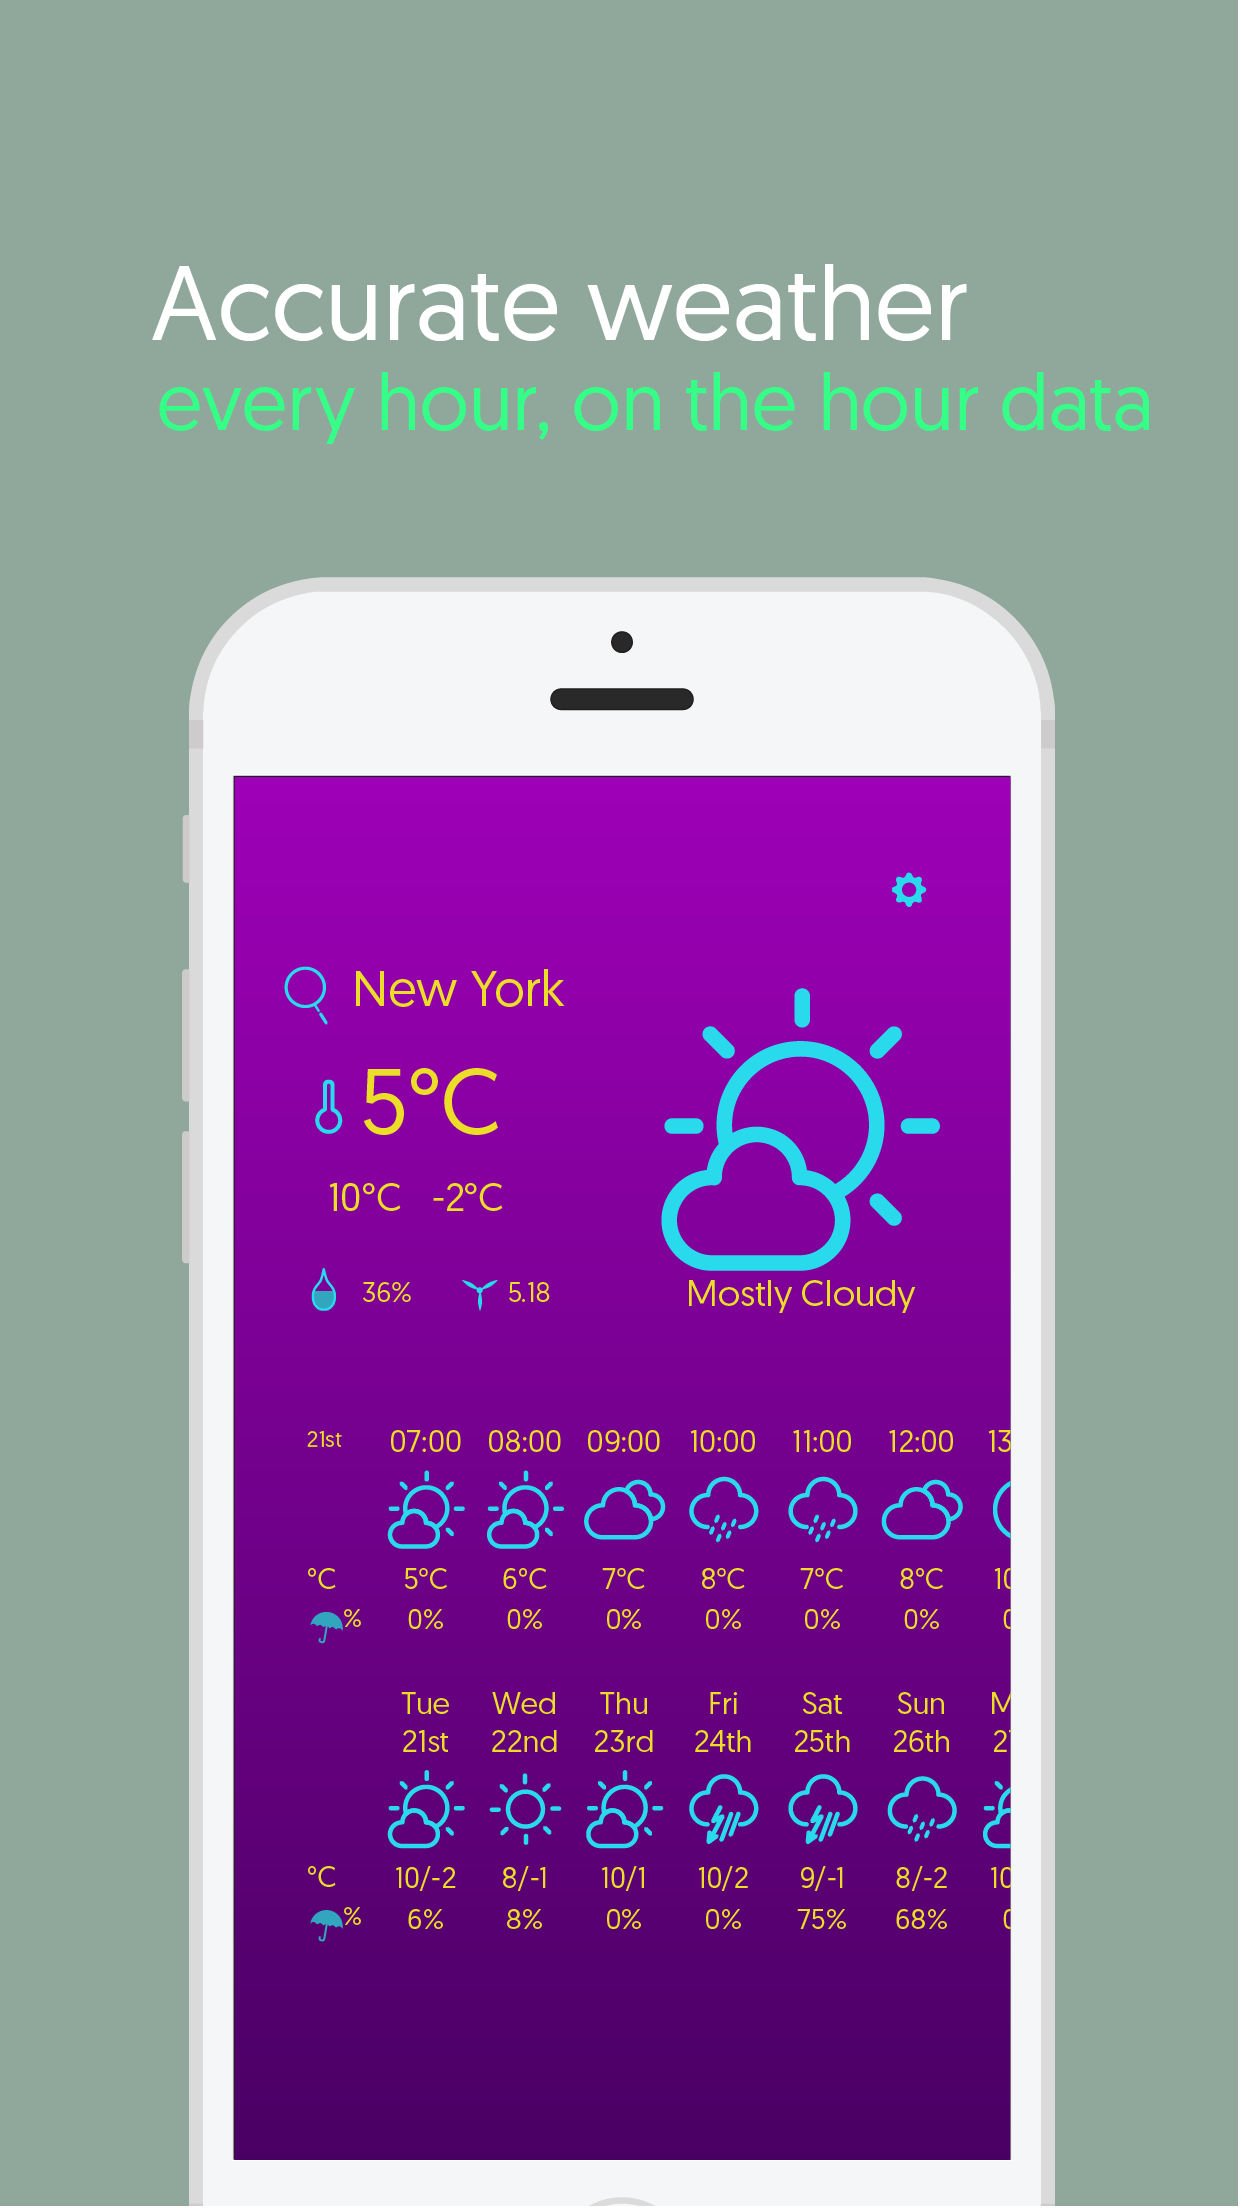
The follow describes the localisation of the app To Do Today available for iOS and Android. It's completely free to download. Please take a look.

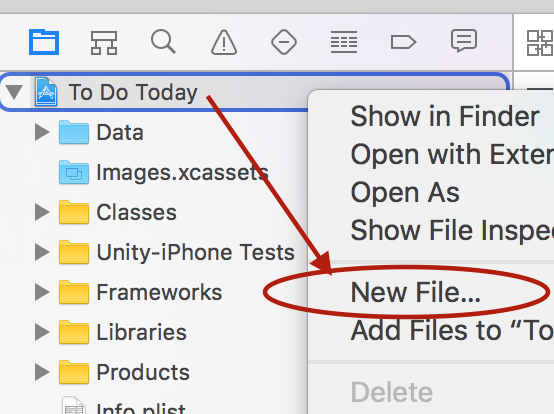
1. In Xcode, right click on your project and choose 'New File'.

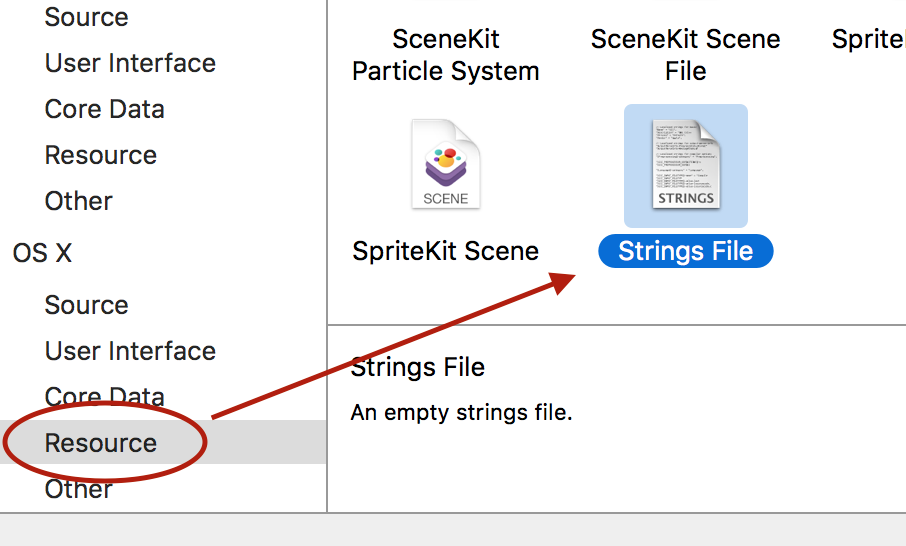
2. Under OS X, choose 'Resource' and create a new file of type 'Strings File'.

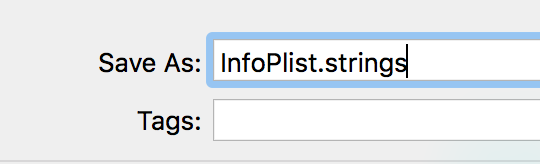
3. Name your new file 'InfoPlist.strings'.

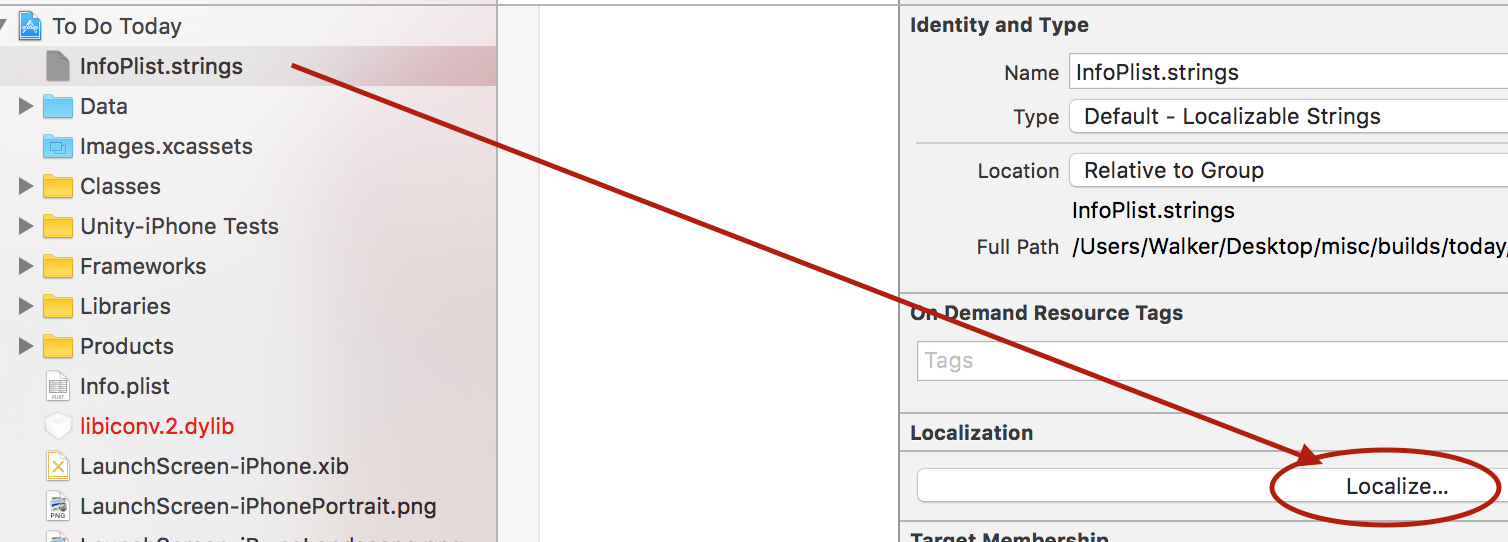
4. Select your file from the project hierarchy and click the 'Localise' to the right.

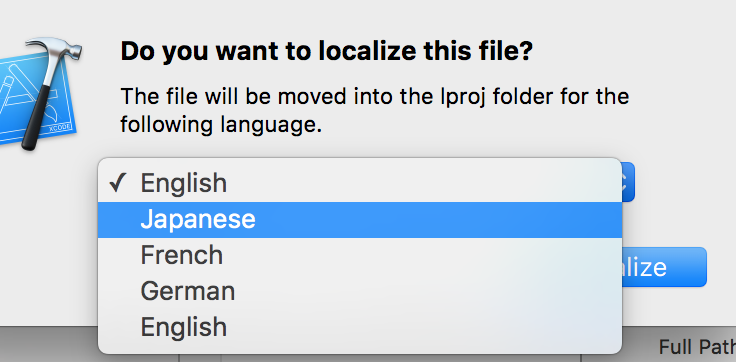
5. Select the language you wish to add from the dropdown and press the 'Localise' button. In this case we will be adding Japanese language support. You will see a tick mark next to the languages you add.

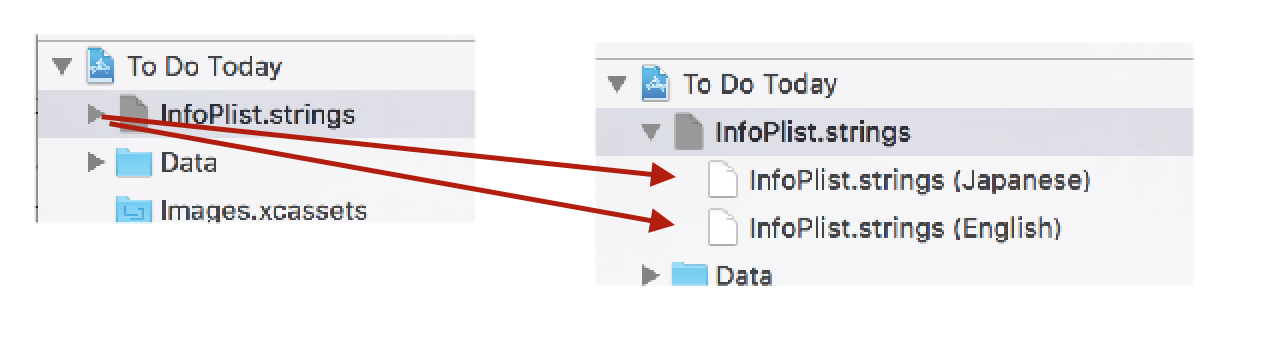
6. Press the small triangle icon found to the left of the file InfoPlist.strings. This will drill down and reveal the added localisation files.

7. In each file, insert the following, replace the app name for your localised string name.

English

    
    "CFBundleDisplayName" = "Today";
"CFBundleName" = "Today";

Japanese

    
    "CFBundleDisplayName" = "めもメモ";
"CFBundleName" = "めもメモ";
8. Build your project and test it out by changing the language used by the OS of the device.

How to localise your app name on Android

For Android, it's a little different.

1. Locate the folder called 'res' in your project. For Unity, this is most likely found in Plugins/Android/native_plugins_lib at the time of writing.

2. Once located, create a folder called 'values-xx', replacing the 'xx' with the two letter combination representing the language you wish to add. For Japanese we create the folder 'values-ja'. You will need to add a new folder for each language you wish to support.

3. Inside each folder, you will now need to create a file called 'strings.xml'. You should also create on inside the 'values' folder. This will be the default language file for your application.

4. In strings.xml, type the following markup, of course replacing the localised string name with the one for your app.

Japanese
     
    <?xml version="1.0" encoding="utf-8"?>
    <resources>
        <string name="app_name">めもメモ</string>
    </resources>


5. Build your app and test by switching between the languages you've added. If you switch to a language you have not added, the default language added in values will be used.

That's it. Hope this helps. Happy localising!

Most recent posts

  1. Flashcards Maker - the app the helps you learn in a flash
  2. Convert Font Suitcase to TTF in 3 Easy Steps
  3. Rain or Shine - Weather Forecast Available Now!
  4. Getting around Apple's silly rules for iOS 10
  5. Localising App Names for iOS and Android

Search site:

Apps by Ubacoda.com

Click the app icons to see more info


Archives

Categories